Welcome to 'GfxRip Tutorial', a tutorial for ... ok ...:p.
This part is for people who never used GfxRip, and so, would like to know the basis.
You will discover the main part of this tool, what they mean, how to work with ... Let's go ! ( If you already know how it works, you can skip this part and go to the next one. )
II/ The Beginning
As you should know it, GfxRip allows you to rip 'everything' from a game ( if you expect to rip musics ... go away ;) )
What will you see after launched the tool ?
Here the 1st screen:
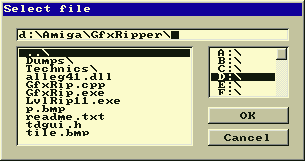
You can choose here the file to work with ... a classic window ( with a nice old school theme :p ).
Next, a new window will appears, with this heading:

-
This is the offset value.
0 means you are at the beginning of the memory you are reading.
You can move in this memory using "Arrowkeys" ( UP, DOWN, RIGHT, LEFT ).
This will increase / decrease the value.
-
'Siz:' is the current image's width / height you see on your screen.
-
'X' is the width. Each Gfx you expect to rip have their own width.
You can use 'Q' & 'A' to increase / decrease this value. ( 'A' & 'Q' for AZERTY keyboards )
-
'Y' is the height. Each Gfx you expect to rip have their own width.
You can use 'W' & 'S' to increase / decrease this value. ( 'Z' & 'S' for AZERTY keyboards )
-
This is the Bitplane value.
You can use 'E' & 'D' to increase / decrease this value. ( 'E' & 'D' for AZERTY keyboards )
-
This is the Palette Search mode.
You can use 'Z' to change it. ( 'W' for AZERTY keyboards )
-
This is the Palette value ...
-
Mode( AM, ST, SP, C+, C- ).
You can change it using 'M'. ( ',' for AZERTY keyboards )